


The Eye Candy
Glaze Mani Pedi Bundle
We’ve got you covered from tip to toe.
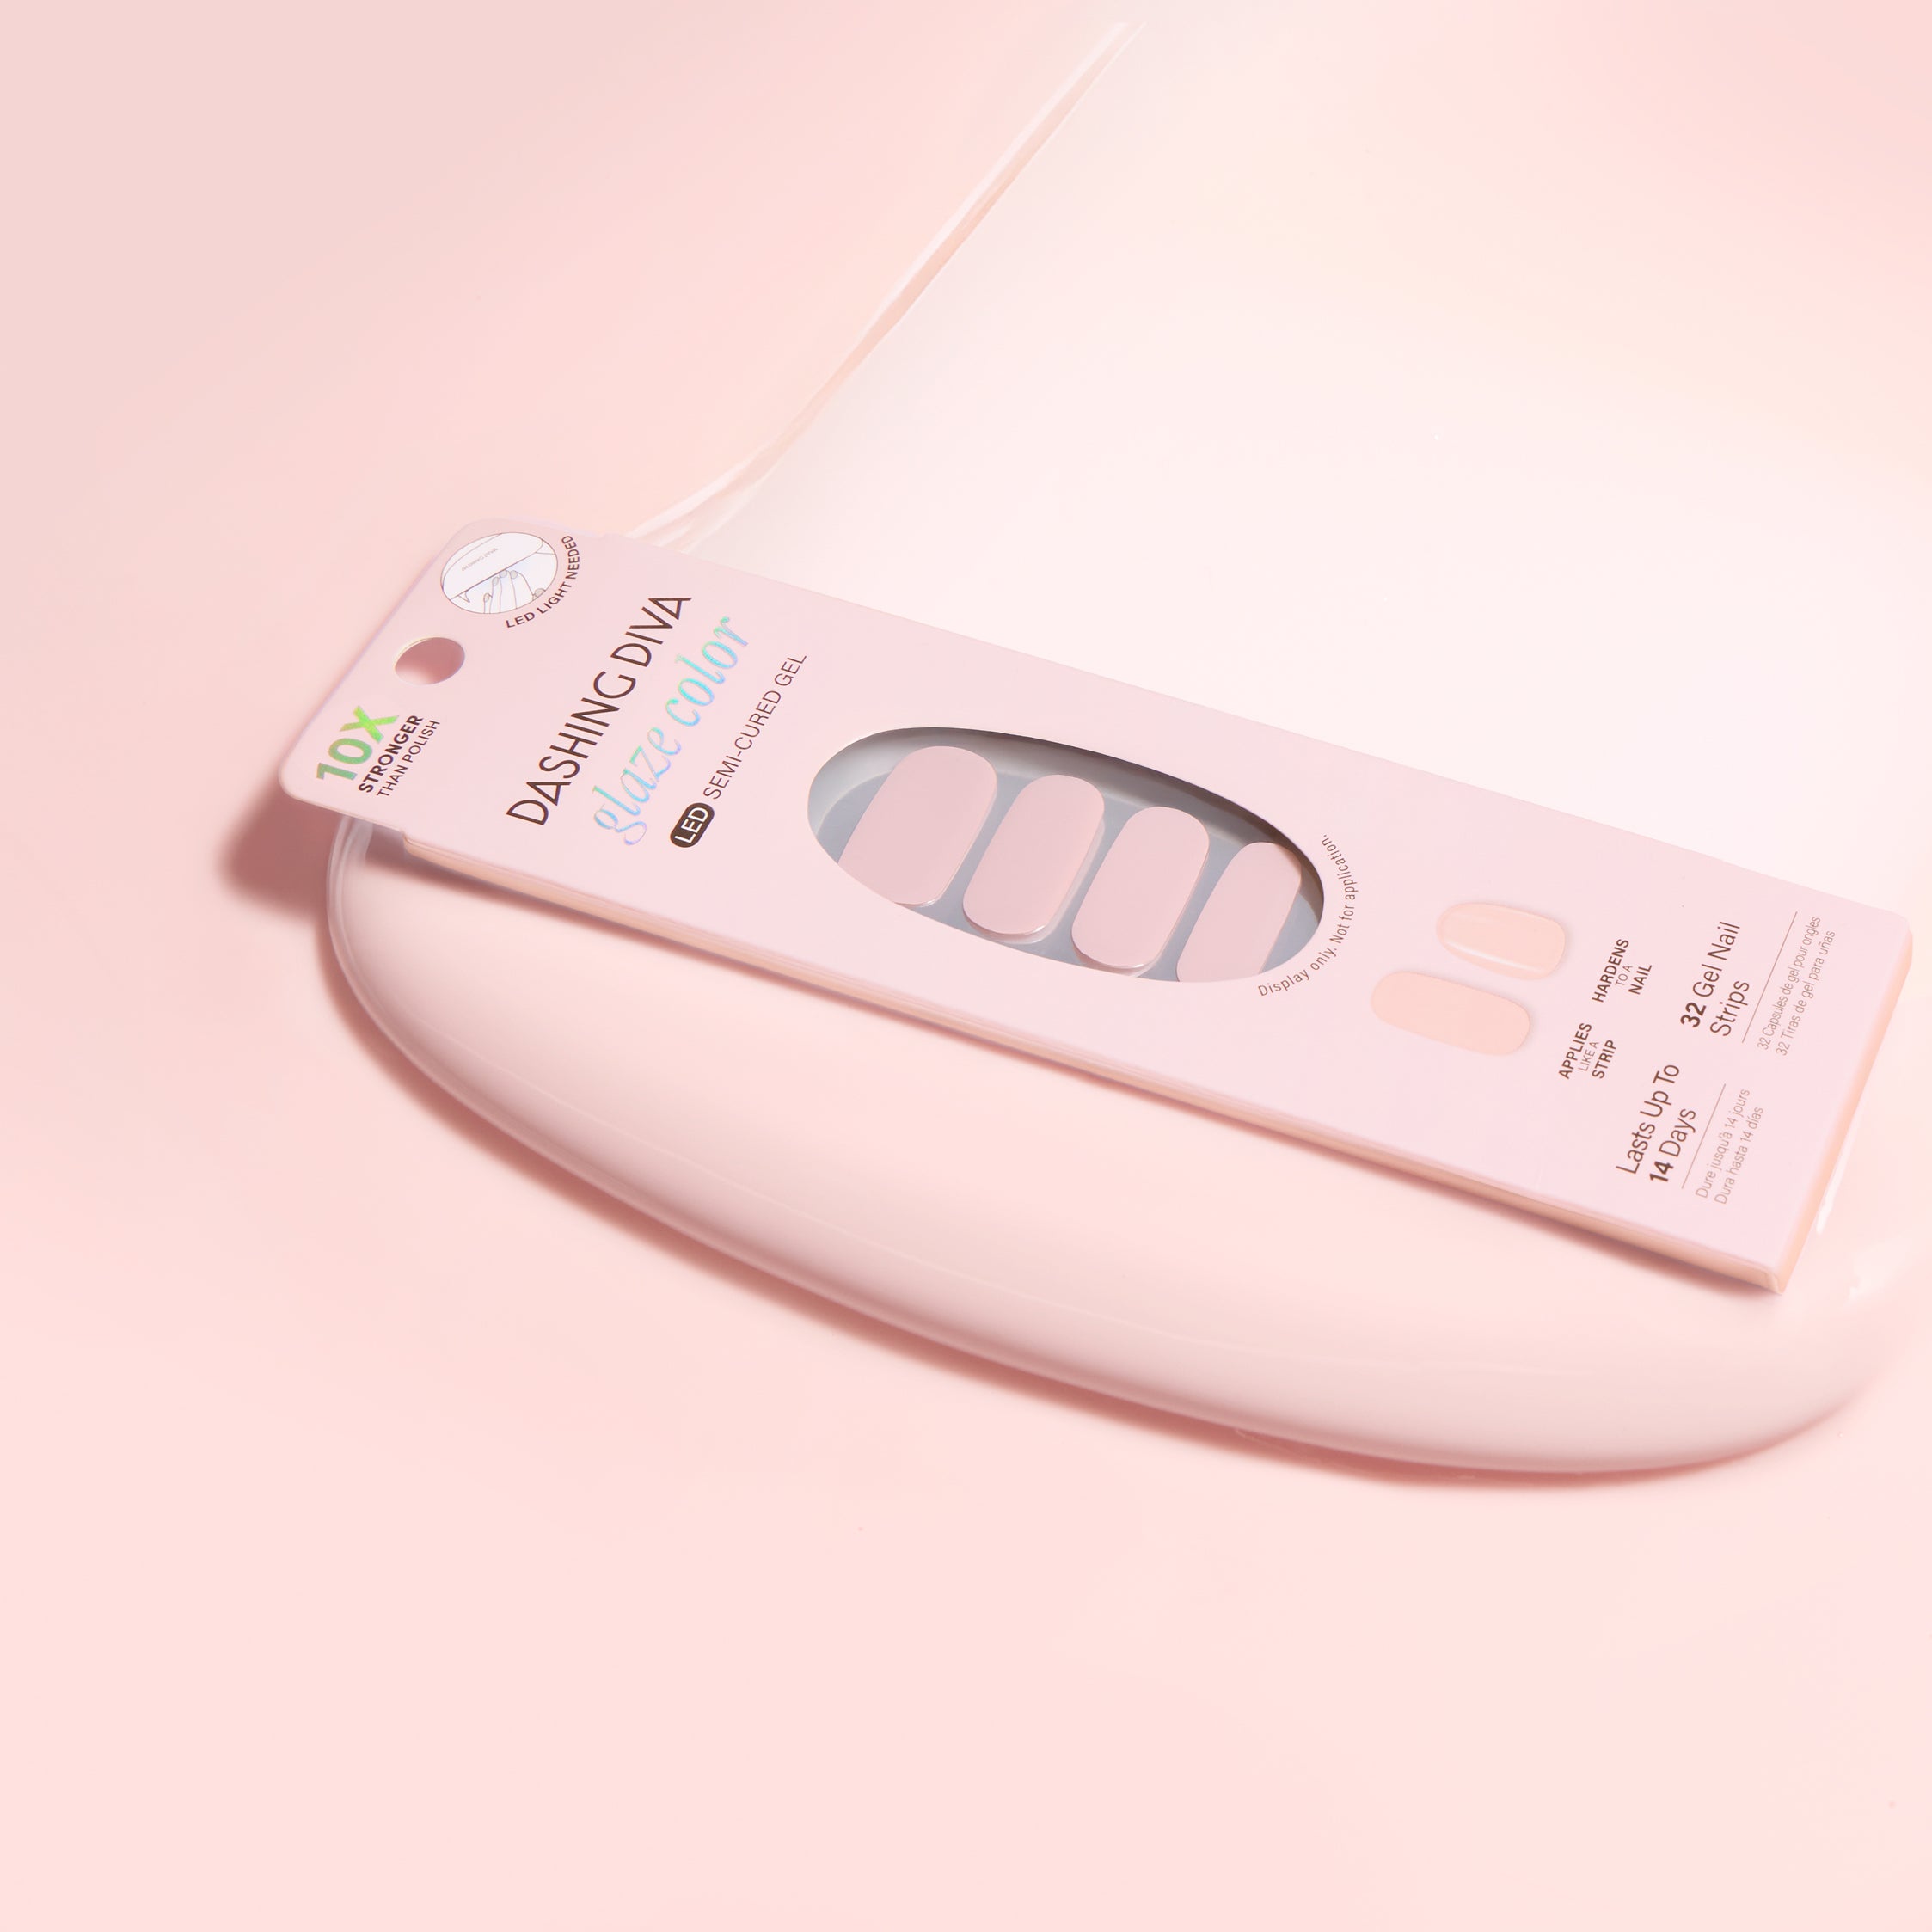
Bundle features a matching mani/pedi set of semi-cured hot pink gel nail strips with mega volume and maximum shine—easily set with the included LED lamp. When it’s time for a change, use Magic Off+ Remover to safely remove your strips while nourishing and strengthening your nails.
Add to cart and the discount is automatically applied at checkout.
How To Apply

GEL STRIPS
QUICK & EASY: Easy-to-apply, fast-curing formula.
MOLDED SHAPE: Voluminous center x thin cuticle edge design sculpts and adds definition to nail shape.
MEGA VOLUME: Plump gel that masks imperfections for a smooth finish.
MIRROR SHINE: Rich, bold color with light-reflecting particles deliver brilliant shine.
EVEN SURFACE: Three perfectly-layered coats of gel polish create an always-even surface.
GEL STRONG: Lasting shine and durable wear for up to 14 days.
REMOVER
Non-damaging: Soak-off alternative.
Castor Oil: For ease and hydration.
Niacinamide: For its strengthening properties.
Gentle removal for most Dashing Diva products, including GelXtend, Gloss, Glaze, and Magic Press.
Removes most artificial nails, including gel nail strips and press-on nails.
Strip: Acrylates Copolymer, Polyurethane-11, Dipentaerythrityl Pentaacrylate, Acrylates Crosspolymer, Polyester-5, Synthetic Fluorophlogopite, Polyethylene Terephthalate, Polyurethane-33, Aluminum Hydroxide, Tin Oxide. May Contain: Chromium Oxide Green, Iron Oxides, Red 36, Manganese Violent, Blue 1 Lake, Titanium Dioxide, Aluminum Powder
Prep Pad: Isopropyl Alcohol, Water/Aqua/Eau
Remover: Acetone, Castor Oil, Niacinamide, Fragrance, Linalool, Hexyl Cinnamal, Benzyl Salicylate, d-Limonene
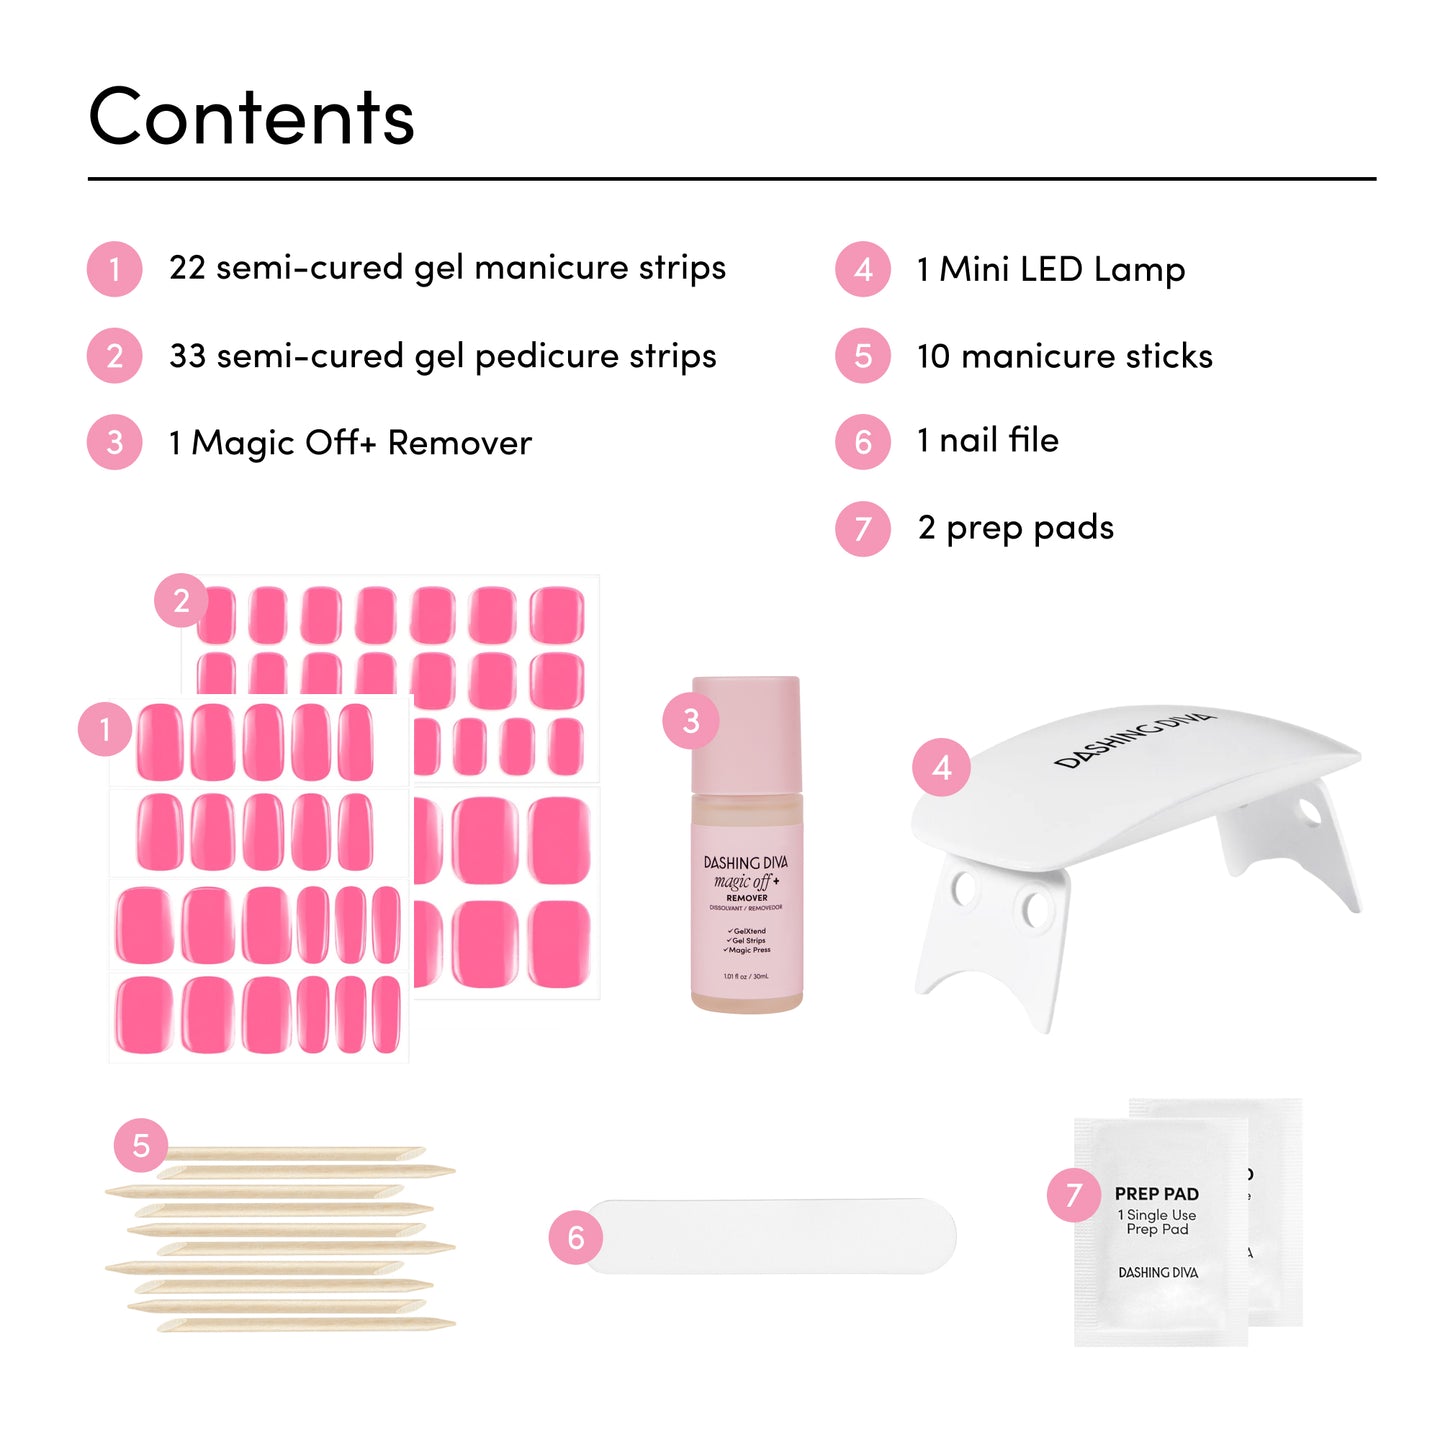
22 semi-cured gel manicure strips, 33 semi-cured gel pedicure strips, 1 magic off+ remover, 2 prep pads, 1 mini led lamp, 1 usb cable, 10 manicure sticks, 1 nail file
How To Apply Glaze

Step 1
PREP
Clean nails with soap and water.
Shape nails and push back cuticles using included manicure stick.
Use enclosed prep pad to ensure nails are clear from oils and residue.
Make sure nails are completely dry before application.

Step 2
SIZE & APPLY
Curve the sheet over each nail to find the best fit. Size down if in between sizes!
Remove the protective film. Gently lift the strip from the sheet, starting from the edge.
Place the strip over the center of your nail, starting at the cuticle line and smoothing outward.
For optimal adhesion, the strip should be placed above the cuticle line, avoiding skin.
Press down firmly from the center, then side to side.
PRO TIP: Spend an extra minute smoothing and pressing down the strip; the more you press = the better the adhesion.
PRO TIP: Using the manicure stick, gently and thoroughly press down on the strip to seal all edges before curing. This will prevent hair and debris from catching onto the nail strip perimeter.
NOTE: GLAZE may become stiff in colder temperatures. Once it is brought to room temperature, it will become flexible again for use. Strips can be warmed up between your hands before application.

Step 3
TRIM
Trim the strip flush to your nails using nail scissors or nail clippers.
Make sure the strip does not exceed your nail length.
Any overhang will cause lifting, chipping, or cracking.

Step 4
CURE & FILE
Press & hold the button on the back of the lamp for at least 1 second to power on.
Cure under the Mini LED Lamp for 60 seconds.
PRO TIP: Be sure not to expose unused strips to LED light while curing, as the strips will harden and become unusable. Store GLAZE in its container with the cover on while lamp is in use.
Position the nail file horizontally along your free edge.
File firmly across your free edge in one direction to remove excess.
PRO TIP: For optimal adhesion, avoid exposing nails to lotions, oils, or water for at least one hour after application.