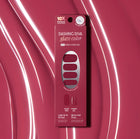
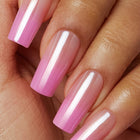
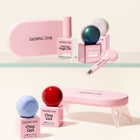
GLAZE
Wash your hands with an oil-free soap and water (dish soap works great to remove oils from the skin and nails! This helps Glaze adhere best). Shape the nails and push back cuticles. Use the enclosed Prep Pad to remove any remaining oil and residue. Make sure your nails are completely dry before application.
Because GLAZE is an all-in-one product, no additional Base Coat, Nail Strengthener or Top Coat is needed. Should you decide to wear an additional product with GLAZE, we cannot guarantee lasting results.
If you’re in between sizes, size down! It’s always better to use a strip that is slightly smaller to avoid any overlap on the skin along the sides of the nail or cuticle line to prevent lifting.
Glaze only requires 1 cure for 45 seconds.
If you notice any discomfort during curing, this may indicate a thinning or weakened nailbed. Remove your hand for a moment, and then replace to finish curing.
Glaze should be trimmed to the exact length of your natural nail prior to curing—please make sure the strip is not extending beyond your nail length, as this can cause lifting and chipping. After curing, take care to file off any remaining excess so that the strip is completely flush to your natural nail.
Tip 1: Before use, clean the cuticle line neatly. This step is important, as deadskin is a main cause of premature lifting, and hair getting caught. Carefullypush back the cuticles and optionally remove your cuticles by trimming with acuticle nipper or gently buffing them away with the included file. Then, ensurethe nails are clear from oils and residue by wiping down with the includedprep pad.
Tip 2: Press down all around the cuticle area and entire nail surface using theincluded wooden stick. Then, press and smooth the entire nail surface withyour finger, making sure there is no gap between Glaze and your nail.
To remove GLAZE, apply cuticle oil (such as our Red Therapy Nourishing Cuticle Oil) to the base of the nail. Using a manicure stick, gently and slowly lift the nail strip from the corner of the cuticle area. Saturate the nail with additional oil to help loosen the adhesive. After a few moments, gently and slowly lift off the Glaze from your nail by pushing from the cuticle line toward the tip of the nail with the wooden stick. Do not rush! If you feel any tension, apply more oil, and allow more time for the adhesive to dissolve.
Oh no! We recommend applying our Red Therapy Rich Nail Serum as an overnight nail mask. It is a restorative treatment that strengthens weak, dry or brittle nails. It is also a good idea to regularly moisturize your nails and cuticles with our Nourishing Cuticle Oil. Please allow any damage to grow out prior to applying your next set to prevent further weakening of the nailbed.
Use our Red Therapy line to treat your nails! Make sure to also regularly moisturize your hands and nails with lotion and oils.
Before curing your nails, make sure your leftover strips are placed in the black carton in order to prevent premature nail curing if exposed to LED lamp light. Glaze will stay fresh for 12 months after being opened!
GLOSS
Nope! They are made of polyurethane (PU), and coated with a layer of real gel.
Wash your hands thoroughly with soap and water, and use the included Prep Pad to remove any oils from your nails. Make sure you completely push back your cuticles as well.
No base coat is necessary, as our nails adhere best to bare nails! If you’re worried about nail damage caused by improper removal, we recommend applying our ‘Red Therapy Base Shield.’ You can use your favorite top coat to seal it in but, we promise, the finish is so shiny, you won’t need to!
Yes! Feel free to reposition the strips as you see fit.
If you’re in between sizes, size down! It’s always better to use a strip that is slightly too small, than too big. If there is any overlap on the skin along the sides or cuticle line, there may be lifting.
Unfortunately, nails that are on the curvier side are more susceptible to wrinkling. To minimize this, firmly press on the strips from the center outwards when applying. Wrinkling can also occur if you’re using a strip that’s too wide for your nail. The material is likely bunching up instead of being stretched out across the width of the nail bed. Try sizing down! Also, please make sure you are not using back-and-forth motions when filing.
You can be up and about as soon as they’re on! Just make sure you stay away from water, lotion, and oils for a few hours after application.
First, apply an ample amount of Magic Off+. After peeling off a corner along the cuticle line, gently roll the strips off. Don’t rush with this! It helps to apply additional Magic Off+ to the fingers you’re using to roll the strips off as well. The more lubrication, the better!
Oh no! We recommend applying our Apply our Red Therapy Rich Nail Serum as an overnight nail mask. It is a restorative treatment that strengthens weak, dry or brittle nails. We also recommend using Red Therapy Base Seal underneath GLOSS. It nourishes weakened nails with copper peptides, while protecting them from any potential damage caused by GLOSS removal. It also a good idea to regularly moisturize your nails and cuticles with our Nourishing Cuticle Oil.
Don’t expose your nails to household cleansers or harsh chemicals! Nails are more permeable than skin. Even prolonged exposure to water can dry out your nails and hands. Always wear gloves when cleaning, and apply hand lotion after you wash or wet your hands. (Just make sure to stay away from water and lotion for a couple of hours after GLOSS application.)
We recommend waiting a few days in between sets to give your nails some time to breathe. Applying a new set right away without taking a break may affect adhesion.
Use our Red Therapy line to treat your nails! Make sure to also regularly moisturize your hands and nails with lotion and oils.
GLOSS should stay fresh for a year after being opened! Pop them in an airtight container to be extra safe.
GELXTEND
There could be a few reasons behind that, so here are the most common reasons and some tips to help!
- Prep: Make sure you are pushing back your cuticles and buffing with a rough buffer (included), not one that smooths your nail. The last step of prep should be wiping your nails with the included alcohol prep pad.
- Glue application: The right amount of glue, with no flooding around the edges, is so, so important; too much glue is just as bad as too little glue.
- You aren’t curing long enough: Make sure all sides are secure by curing the entire hand again for 60s, to make sure the glue is fully hardened.
- Nail application: Do not move while holding the nail as you’re curing, as this could cause bubbles.
Answer: This process could have a learning curve for sure! But the perfect amount of glue is dependent on the size of your nail bed.
PRO TIPS:
- Apply glue to the bottom 1/3 of the pre-buffed area of the nail, a little bit above the cuticle edge
- Do not press so hard when applying the nail tip; stop right when the glue reaches your natural nail edge.
- If the glue does not cover your entire nail bed or you see bubbles, take off the nail and apply more before curing.
Answer:Clear nails only need 60seconds to cure, but the sheer design nails must be cured at least2x. If you feel you used a thick layer of glue with a clear nail tip, we recommend curing twice to make sure the glue is fully hardened all the way through.
No. The GelXtendsoft gel glue is specially formulated to work with the GelXtend clear nail tips & pre-designed nails in the GelXtendproduct line.
Can I ‘flash cure’ before fully curing the nail extension?
There is no perfect size for one of my nails. Can I trim or file it to fit?
Can I re-glue a nail if it falls off?
I accidentally left my glue in a cold temp, and it froze! What can I do?
No. Our product works best when you hold/press the nail for the full 60 seconds to ensure the best adhesion and long-lasting wear.
For the clear nails, absolutely! For our pre-designed nails, be cautious not to chip away at the nail design;it might cause the gel layers to become exposed and wear away.If you are between sizes and do not want to trim the larger size, size down.
We recommend getting a new nail from your set. However, if it is a pre-designed set and you are able to remove the glue from the artificial nail, you can re-use it. All nails are technically made for one-time use.
The glue cannot be stored in conditions below 32° F, but not to worry; just let your glue sit in a cup of warm water until it softens back to normal!
What are the different shapes and lengths?
MAGIC PRESS is available in three lengths, Short, Medium, and Long, and four shapes, Square, Oval, Coffin, and Stiletto.
If not otherwise indicated, it is safe to assume that the set is Medium length!
Push back your cuticles with the wooden tool provided and wipe your nails with the included Prep Pad. Prep makes a huge difference!
No base coat is necessary, but we recommend applying our Red Therapy Base Shield! It contains velvet powder particles that smooth out the surface of your nails to prolong the wear of MAGIC PRESS. It also protects your nails from damage caused by hasty removal.
MAGIC PRESS already comes with an adhesive on the back, so there is no need for glue, but if you want longer wear than 7 days—you can use glue!
If you’re in between sizes, size down! If the nail exceeds the width of your nail bed, it will lift along the sides.
Unlike real nail polish, there is no wait or cure time for these! Just make sure you refrain from touching water, oils, or lotion for a few hours after application. It’s best to apply the nails before you go to bed, so that they can fully set overnight!
We recommend snuggling in the nails as close to the cuticle line as possible. This should prevent a gap from forming!
Thoroughly wipe your nails with the included Prep Pad, and wait until they are completely dry before applying MAGIC PRESS. Make sure you are not applying the nails upside down! The handle with the imprinted size number should be towards the cuticle line, and not the other way around. There are some people with naturally oilier nail beds, so that may affect adhesion as well.
No, they are made for one-time use only. Once MAGIC PRESS is removed, the adhesive on the back no longer sticks to your natural nails.
Apply an ample amount of oil (any kind!) along the cuticle, and gently push the nail off with the included wooden tool. Don’t rush with this! It helps to dip the wooden stick in oil as well.
Oh no! We recommend applying our Apply our Red Therapy Rich Nail Serum as an overnight nail mask. It is a restorative treatment that strengthens weak, dry or brittle nails. We also recommend using Red Therapy Base Shield underneath MAGIC PRESS. Not only does it improve adhesion, it also protects your natural nails from any potential damage caused by MAGIC PRESS removal. It also a good idea to regularly moisturize your nails and cuticles with our Nourishing Cuticle Oil.
Keep them to mix-and-match with other sets for a customizable manicure!
Please avoid water, lotion, and oils for a few hours after application. Moreover, while our nails are durable, we always recommend taking care while having them on (i.e., wearing gloves while doing dishes, etc.). It’s also a good idea to press on the nails several times a day for 72 hours from application. The nails have a pressure sensitive adhesive, so the more you press, the better they stick!
Glue On
Make sure you wash your hands with soap and water to remove any natural oils. Push back your cuticles as well.
Apply a layer of the included glue onto your natural nailbed, and along the cuticle area of the glue-on nail as well. Then, gently press on the nail. Keep pressure applied for 10-30 seconds to ensure that they fully adhere. Make sure to apply an ample amount of glue, or else air bubbles may form underneath!
No worries! Simply use a cotton swab to wipe away the excess glue.
Trim the gel nails and buff the surface to remove the protective top coat. Soak the nails in acetone for about 10 minutes until they are soft, and wipe away the nails and glue.
As long as they are removed properly, your nails should not get damaged. They should never be forced off or popped off from your natural nails.
Red Therapy
Base Shield is for MAGIC PRESS. It creates a matte, smooth finish for the press-ons to adhere to.
Base Seal Treatment is for GLOSS. It can either be used before GLOSS as a protective measure, or on its own as a nail treatment in between sets!
Prep your nails first, apply Red Therapy, and then apply your nails! Make sure you fully dry your nails in between each step.
This can happen if your nails are not completely clean or dry before applying Red Therapy. If you wash and dry your hands completely, and apply one more layer, it will disappear!
Nope! We just recommend staying away from oils for a few hours after application. You’re free to apply cuticle oil after that!
Don’t expose your nails to household cleansers or harsh chemicals! Nails are more permeable than skin. Even prolonged exposure to water can dry out your nails and hands. Always wear gloves when cleaning, and apply hand lotion after you wash or wet your hands.
Diva A-List Rewards
Join our loyalty program called the Diva A-List!
The program allows you to redeem rewards easily at checkout in increments of $5, $10, $20, or $40 😊🎉
Once rewards are redeemed they can not be added back to your account. The Rewards codes do not expire and can be used in the future. 🎉
When processing a return the rewards used will be deducted from your refund.
*Note to apply rewards your cart must total $35 at minimum.
*Note that you will still want to meet the $25 minimum
subtotal to receive free shipping.
In addition, we hope that you'll find the rewards page is
user-friendly and easier to navigate. You can easily view the actions
you can complete to earn stars. You will also be able to view the perks of achieving each new program tier - for
example, Diva Icon members now receive double the points on items purchased
from new collection launches!
We're super excited to offer these new features and benefits
to our loyal customers and are here to answer any additional questions you may
have.
Feel free to contact Customer Support at info@dashingdiva.com.
If your Diva Rewards account shows no activity for a year (no purchases/orders) your stars will automatically expire and cannot be reinstated.
Yes, in order to maintain your Diva Pro or Diva Icon tier status, you must meet the tier spend threshold within the rolling calendar year. If the minimum spend is not met, your tier status will reset.
Log into your Diva A-list account at the top of our homepageon desktop by clicking Diva Rewards, or at the bottom of the navigation screenon mobile, also by clicking Diva Rewards.
Here you can view your current star balance, as well asredeem $ off codes to apply at checkout, view your rewards history to find anyactive codes and view stars awarded.
If you scroll down to ‘Ways to earn stars’ you can view the actions you can complete to add more stars to your balance!
At the bottom of our loyalty page, you can refer your friendsand family who are new to Dashing Diva!
Just enter their email address and they will receive an email with a link to our site along with a code that will give them $10 off at checkout.
Once they’ve submitted their order of $35 or more through your referral link, you’ll earn a $10 off coupon code to use on your next order!
This will be sent via emailand can be found in your rewards history when you log in.
You can still view your order history by clicking on the account login icon at the top of our homepage on desktop, or at the bottom of the navigation screen on mobile.
Here you can also update your shipping addresses – be sure to keep these up to date and delete any that are no longer current.